Cisco ACI NTP Configuration [Step By Step Example]
Contents
NTP (Network Time Protocol) Overview
The Network Time Protocol (NTP) is a networking protocol for clock synchronization between computer systems over the networks.
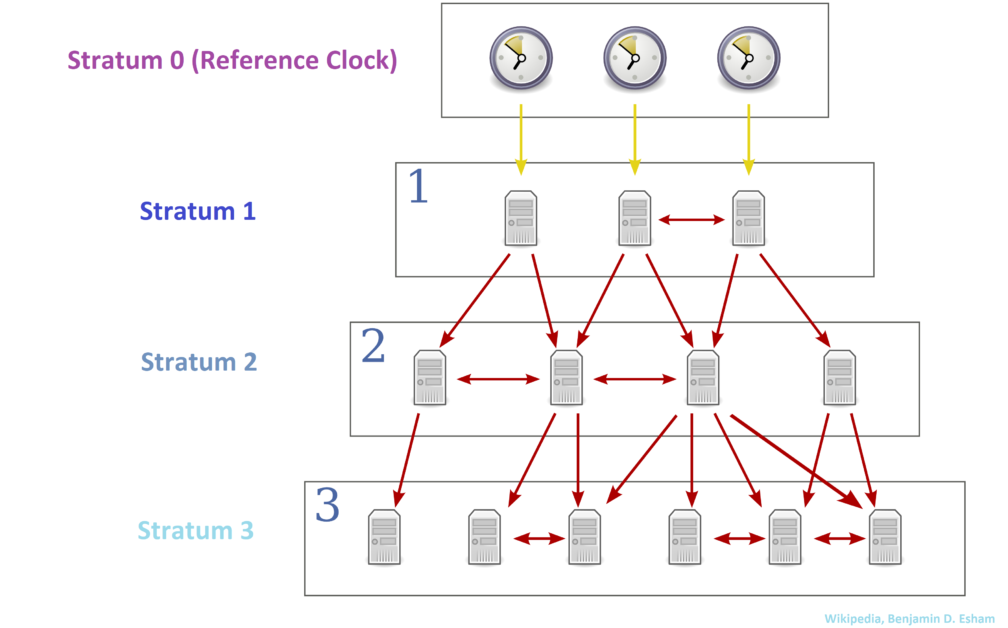
NTP uses a hierarchical, semi-layered system of time sources. Each level of this hierarchy is termed a stratum and is assigned a number starting with zero for the reference clock at the top. A server synchronized to a stratum n server runs at stratum n + 1.
The number represents the distance from the reference clock
Wikipedia
The following steps illustrate the configuration of NTP in the Cisco ACI Fabric:
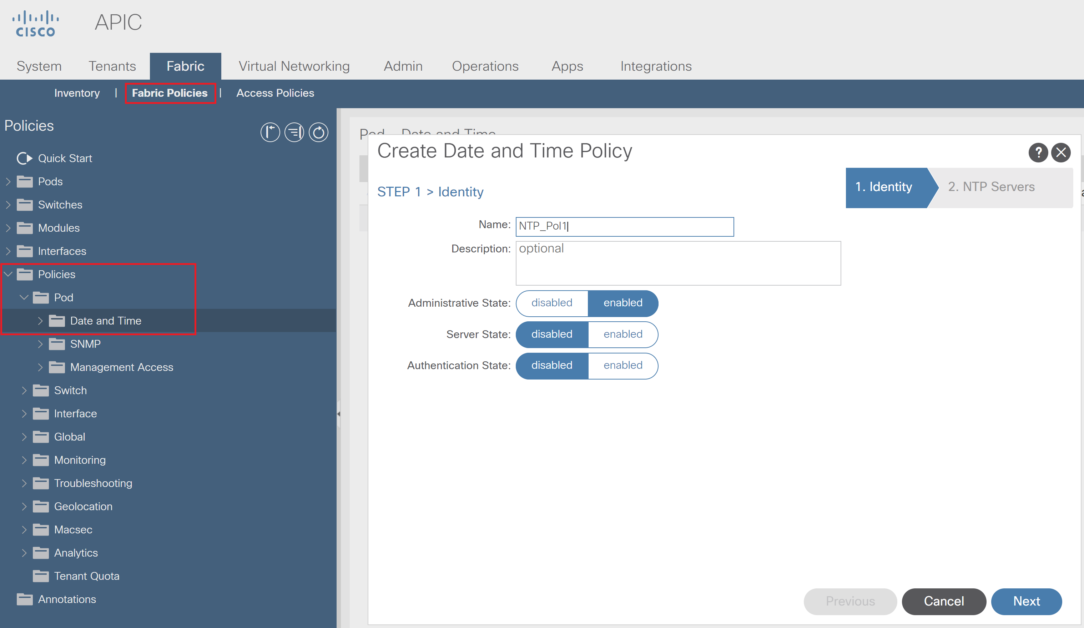
Step-1: Create Date and Time Policy
Navigate to Fabric Policies > Policies > Pod > Date and Time:
- Modify the default policy or create a new one, in this example, we will create a new NTP policy.
- Set the Administrative state as Enabled to Activate the NTP policy.
Leaf SVI – BD to serve as NTP Server (or Master for IOS terminology)
Using a Bridge Domain SVI (Subnet IP) as an NTP Source for downstream clients is not recommended. When a Leaf switch is enabled as NTP server, it will respond on any Interface. Issues can arise when attempting to use the SVI address of a Leaf, rather than the management IP.
For Example, In case of an SVI serving as NTP source is not available on the Leaf which endpoint are connected, then NTP won’t work for them, as a workaround, you can deploy a dummy static path for that Leaf in order to deploy the SVI, else, use the management Interface.
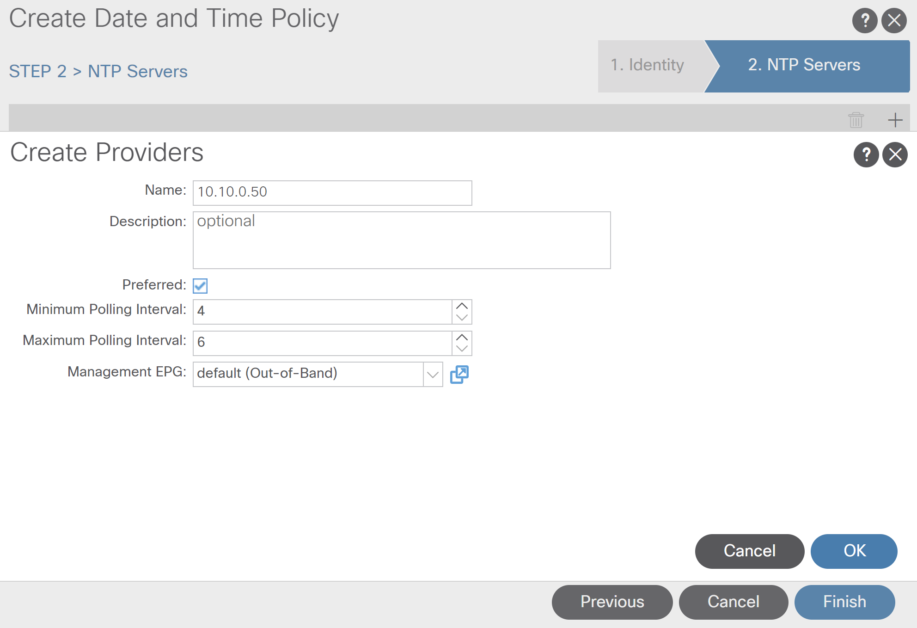
Click Next and in the NTP server menu, add (+) new NTP server:
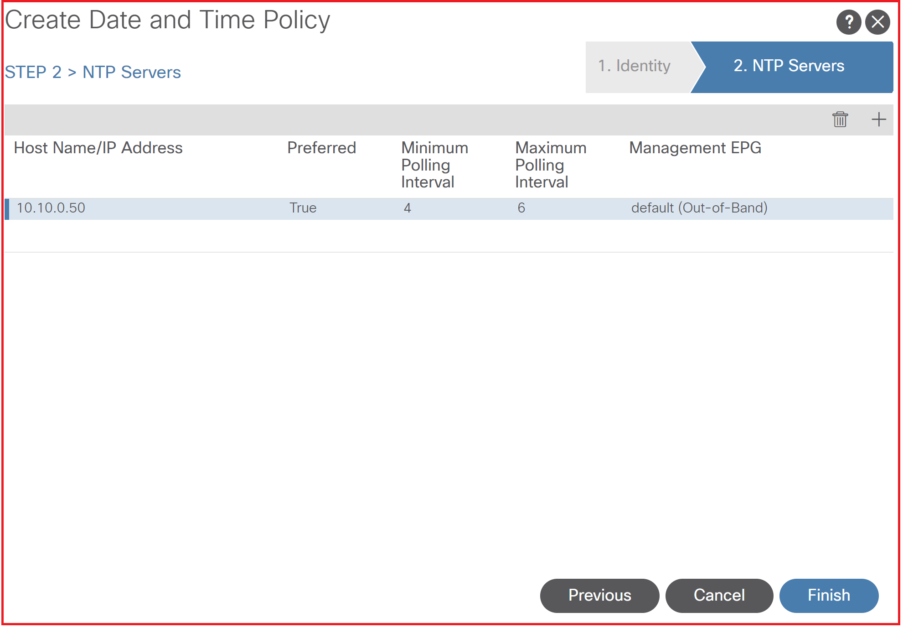
- Specify the IP or FQDN
- Chose the type of connectivity to the NTP server OOB or INB (OOB in this example)
- You can specify if the NTP server is preferred in case multiple NTP server are introduced.
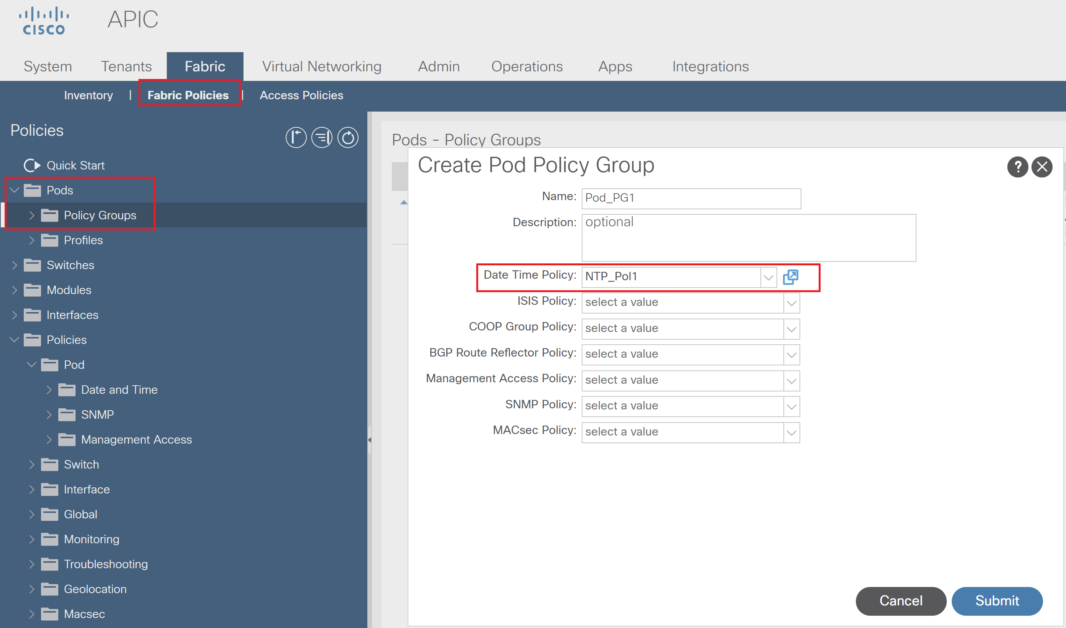
Step-2: Create a Pod Policy Group and Apply the NTP Policy
Navigate to Fabric Policies > Pods > Policy Groups:
- You can create or modify an existing Pod Policy group.
- If the Pod Policy group, specify the NTP Policy.
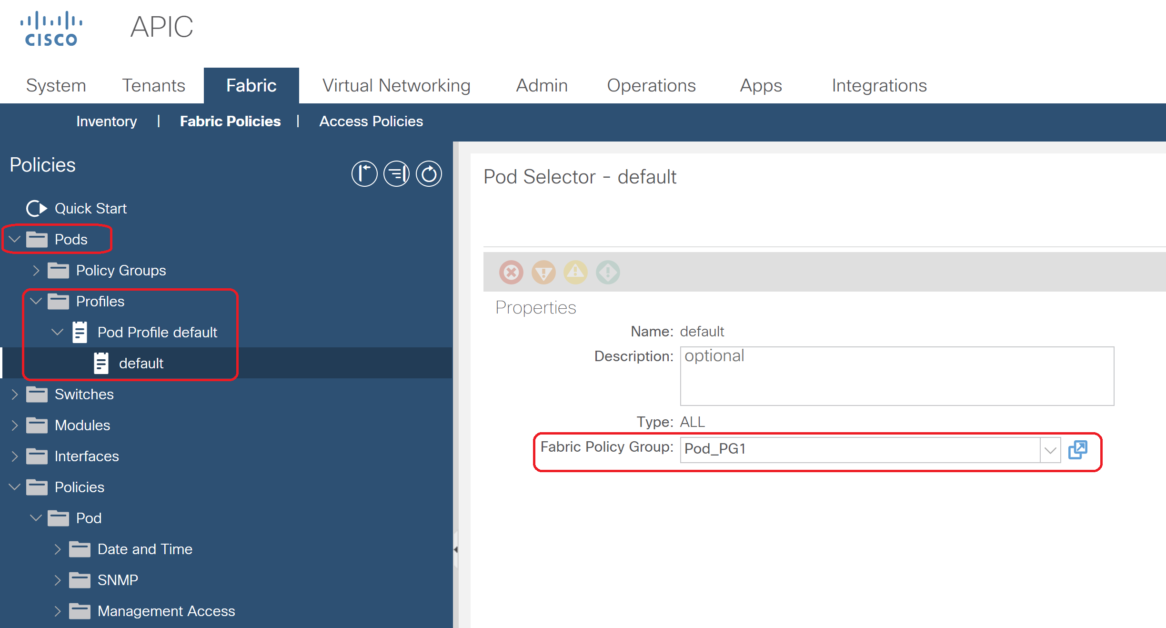
Step-3: In the Pod Profiles , select the Pod Policy Group
Navigate to Fabric Policies > Pods > Profiles > Pod Profile default > default
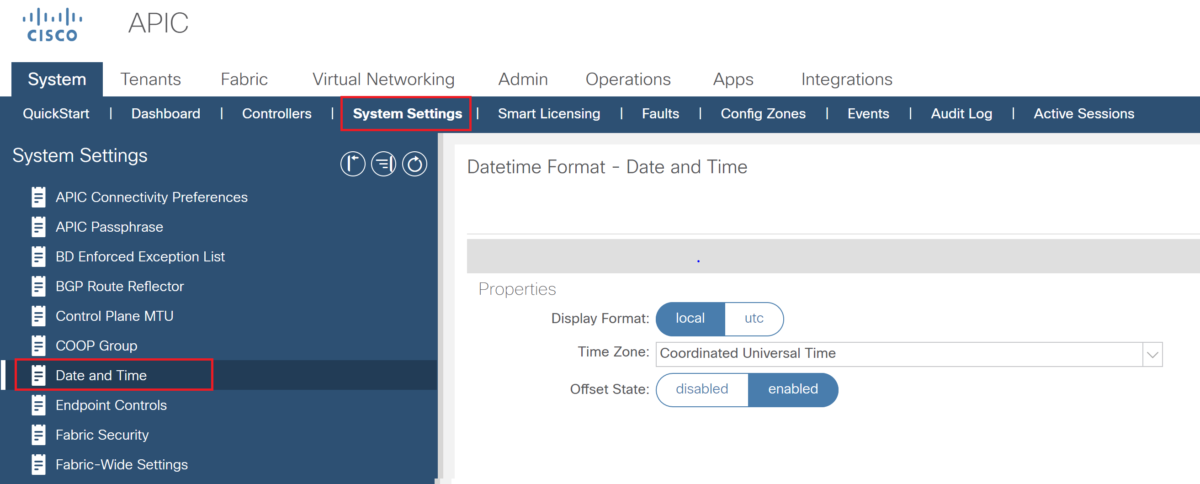
Step-4: Edit Date and Time Display Format (optional)
You can edit the default Date Time Format policy to set the Display time zone format:
- Navigate to System > System Settings > Date and Time
Reference: Cisco