Out of Band Configuration In Cisco ACI [Step By Step]
Below are the Cisco ACI OOB configuration steps, we will use an example for illustration:
Contents
I- Assign static node management address
- Navigate to: Tenant > Tenant mgmt > Node Management Addresses > Static Node Management Addresses
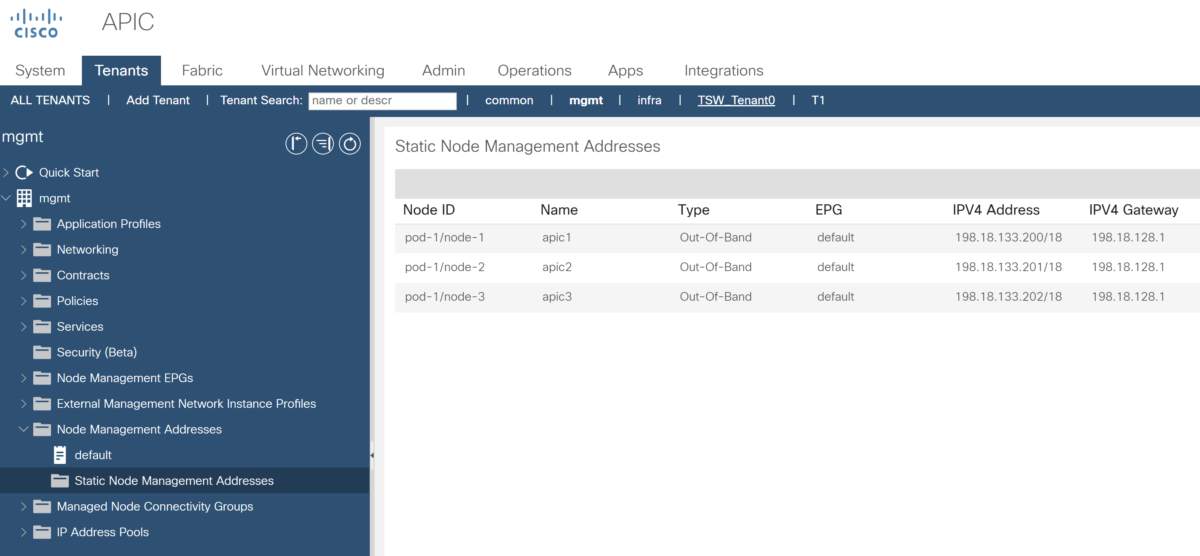
- Configure APICs and switches OOB addresses:
Create on the action pane and click Create Static Node Management Addresses:

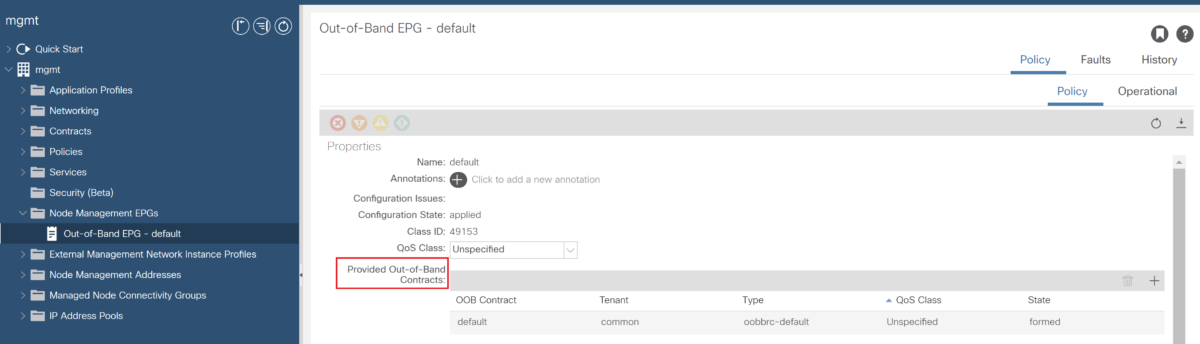
II- Provide an OOB contract on the Out of Band EPG
Navigate to: Tenant > Tenant mgmt > Node Management EPGs > Out-of-Band EPG default
In the Provided Out-of-Band Contract section, add a contract. We used default, but, It can more specific like an SSH, HTTP contract:
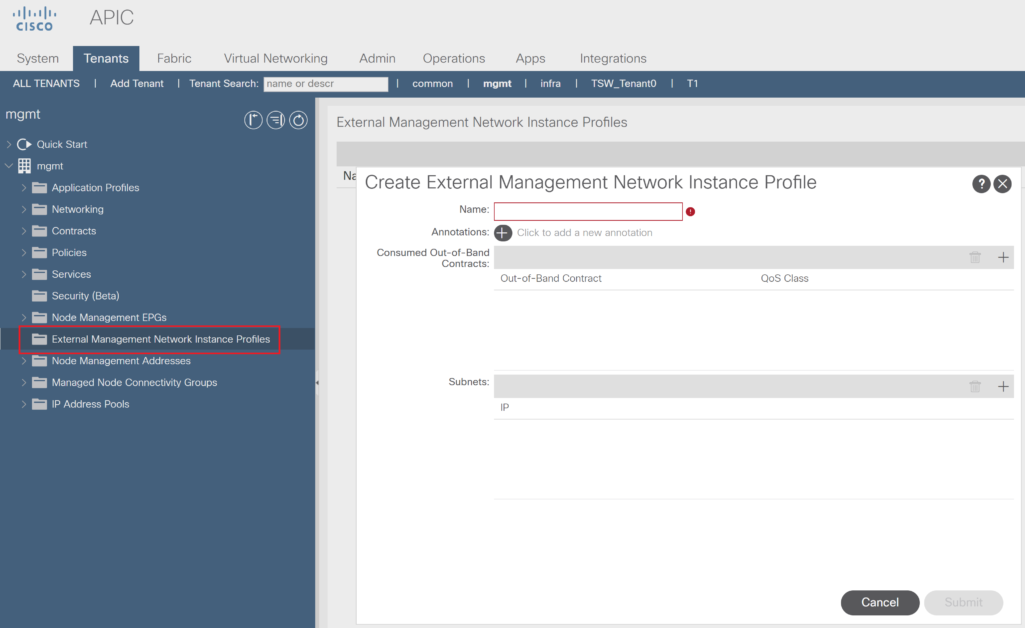
III- Define an External management network instance profile
Navigate To: Tenant > Tenant mgmt > External Management Network Instance Profiles
- Create External Management Network Instance Profile:
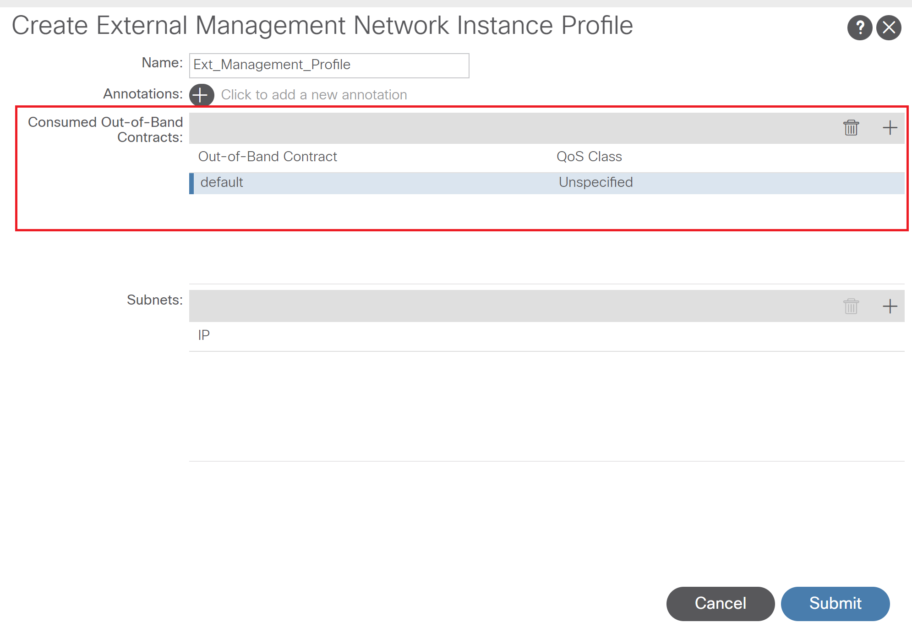
IV- Consume the OOB Contract
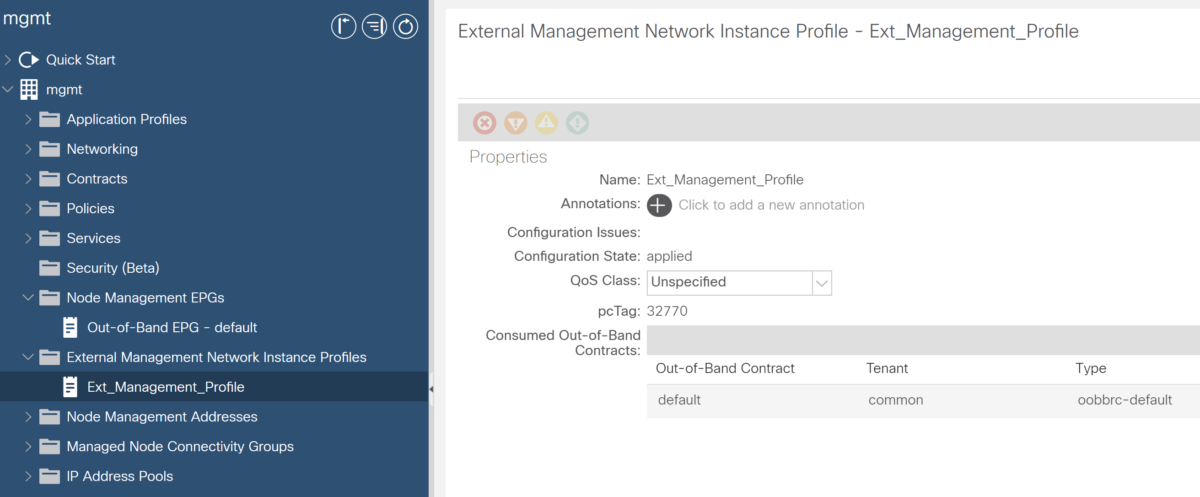
Navigate To: Tenant > Tenant mgmt > External Management Network Instance Profiles > Ext_Management_Profile
In Consumed Out-of-Band Contracts, add the contract provided under the OOB EPG:
Note:
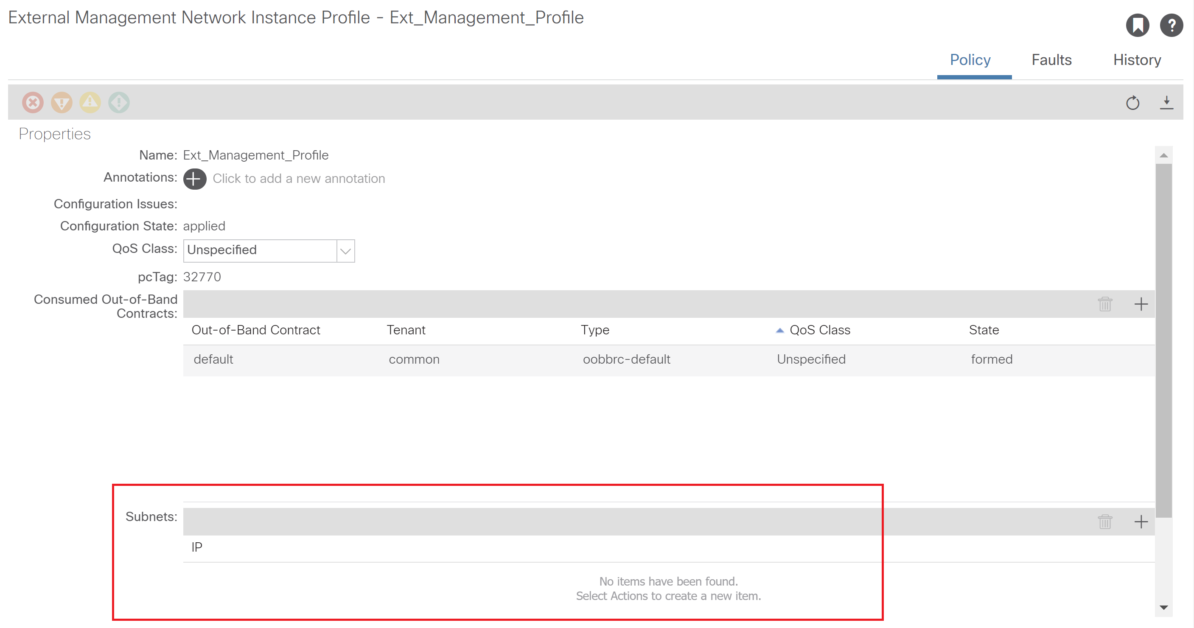
- A External Management Network Instance Profile defines which External subnets can have access to ACI OOB management addresses.
- By defaults all External subnets have OOB access (for initial setup purposes), but, you can limit it here.
Note
Summary
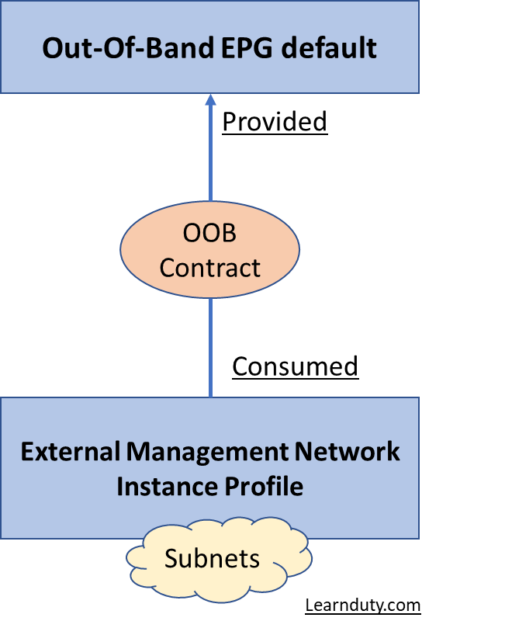
And because a picture is better than 1000 words, we can illustrate the OOB configuration in this simple diagram:
OOB Verification on Cisco ACI
Verify OOB on APIC:
- Check the configured OOB management address on APIC:
ifconfig oobmgmt- You can also perform ping and traceroute on APIC to test connectivity.
ping 192.18.133.221

bash
traceroute 192.18.133.221- Check APIC management preference:
apic1# bash
admin@apic1:~> route -n
Kernel IP routing table
Destination Gateway Genmask Flags Metric Ref Use Iface
0.0.0.0 192.18.4.1 0.0.0.0 UG 16 0 0 oobmgmt
0.0.0.0 10.10.50.1 0.0.0.0 UG 32 0 0 bond0.300
Verify OOB management on Leaf and Spines nodes:
- You can verify the configured OOB management address on the fabric node:
LEAF123# show ip interface brief vrf management

Interface            Address              Interface Status
mgmt0 192.18.223.125/24 protocol-up/link-up/admin-up- You can check the routing table:
LEAF123# show ip route vrf management
IP Route Table for VRF "management"
'*' denotes best ucast next-hop
'**' denotes best mcast next-hop
'[x/y]' denotes [preference/metric]
'%<string>' in via output denotes VRF <string>

0.0.0.0/0, ubest/mbest: 1/0
*via 192.18.223.254/32, mgmt0, [0], 04w04d, local- You can capture via tcpdump ‘eth0’, which is the oobmgmt interface used on the leaf and spine switches, and uses ‘-n’option for tcpdump to give the IP addresses used instead of the DNS names, and then filtering specifically for NTP packets (UDP port 123).
tcpdump -n -i eth0 dst port 22