How to Configure an EPG in Cisco ACI
Some prerequisite are needed before configuring an EPG in ACI which are basically:
- Of course tenant is created,
- The VRF and th Bridge domain,
- and the Application profile
Once you create a tenant in Cisco ACI, the next configuration would be to configure the VRF:
1- Create a VRF and Bridge Domain:
Navigate to Tenant > Networking > VRFs , right click and create a VRF (provide a a name):
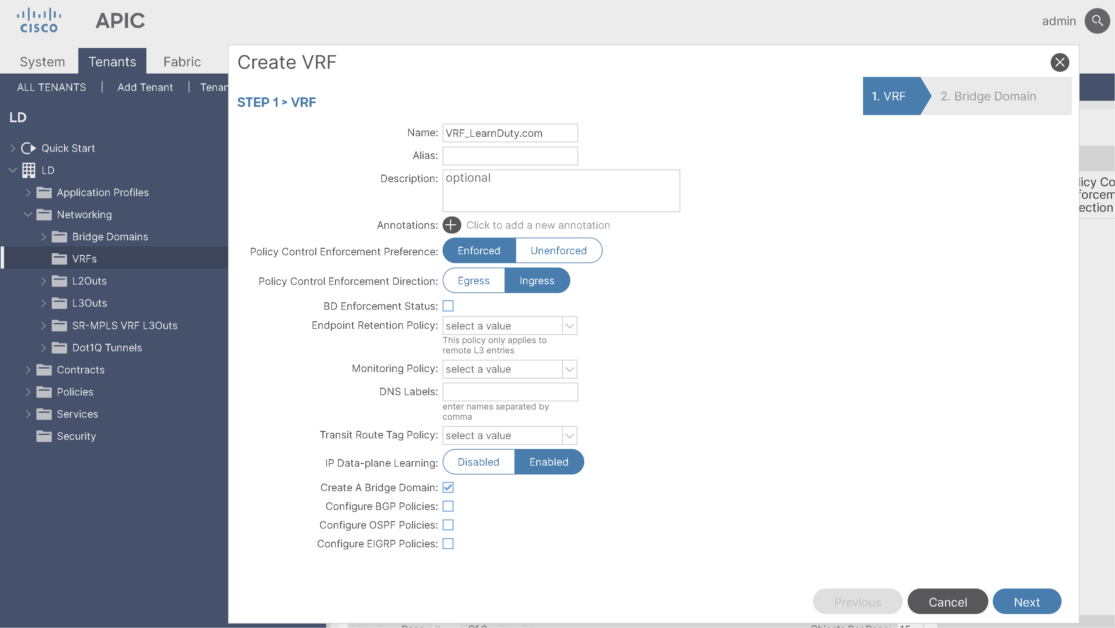
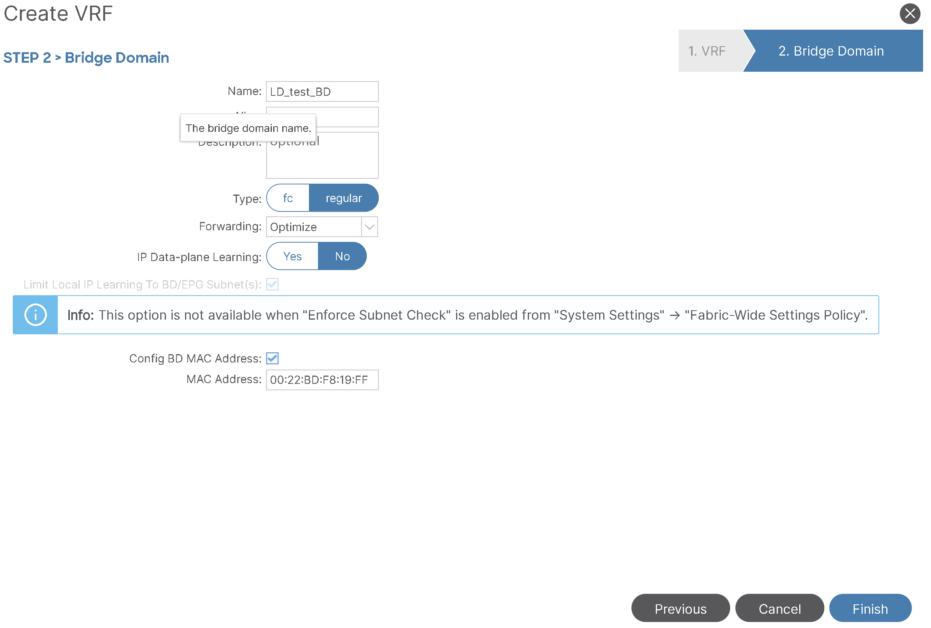
Then you can even start creating a bridge domain from the same pup-up interface (if you keep option checked) or you can create it through normal process via: “Tenant > Networking > Bridge Domains”.
2- Create an Application Profile:
Navigate to: Tenant > Application Profiles > right click “Create Application Profile”:
- Enter the name of the Application profile and submit:
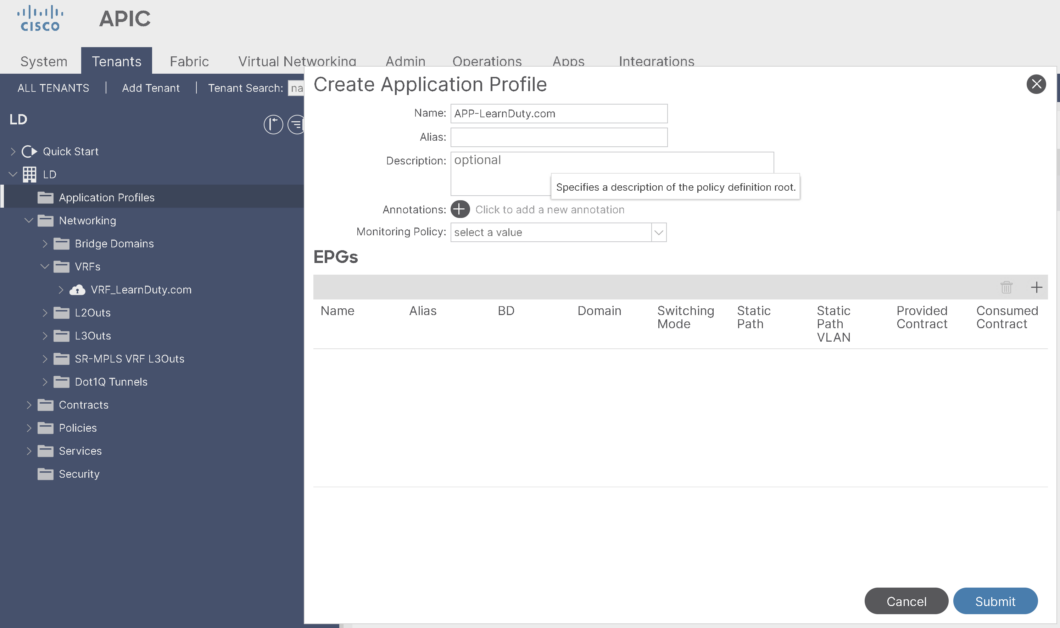
we have the option to start creating EPG from the previous Application profile creation tab, which could be beneficial to gain time, but it won’t be complete.
Once you already have the VRF and Bridge domain configured, you can configure the EPG:
2- Create an EPG:
- Navigate to: Tenant > Application Profiles > Expand the already created application profile:
- Right click on Application EPGs and select “Create Application EPG”:
Initially, you just need to enter the EPG name and select the Bridge domain (already created previously) and click Finish:
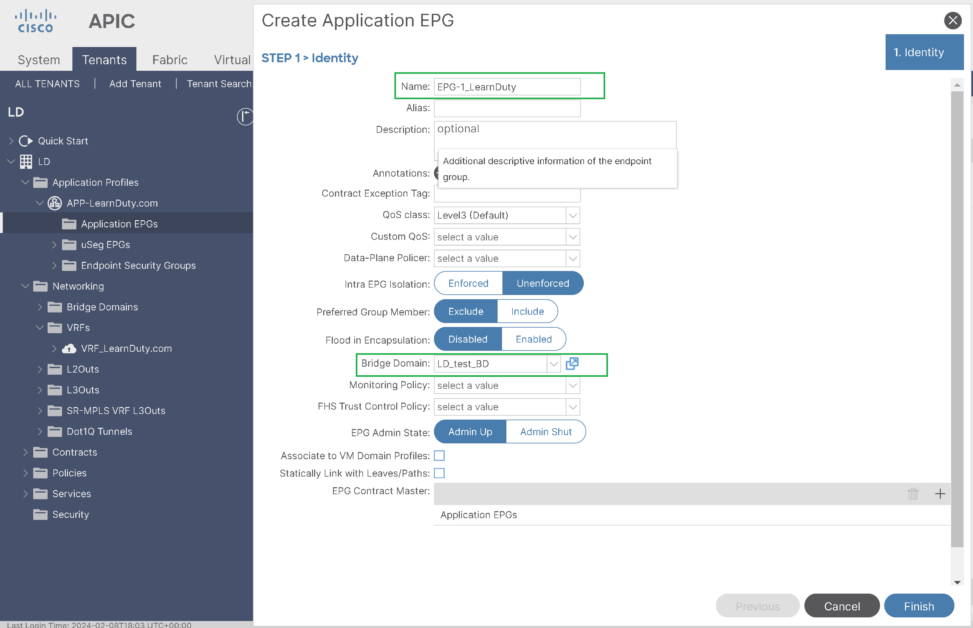
The EPG will show up in the left Panel and once you expand you will see the remaining configuration parts:
- Domain (Either physical Domain, VMM or L2 domain)
- Static ports
- Contracts
- etc
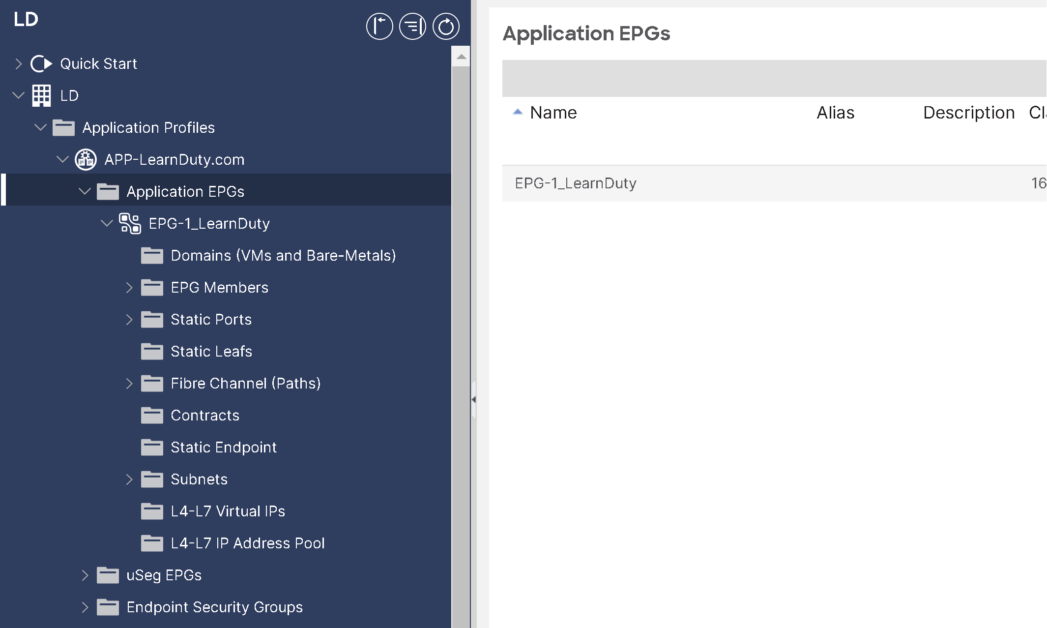
The remaining parts of the configuration differ for each use case:
- if you are using VMM domain, you associate the EPG to VMM domain and potentially no need for static port (since it will dynamically created).
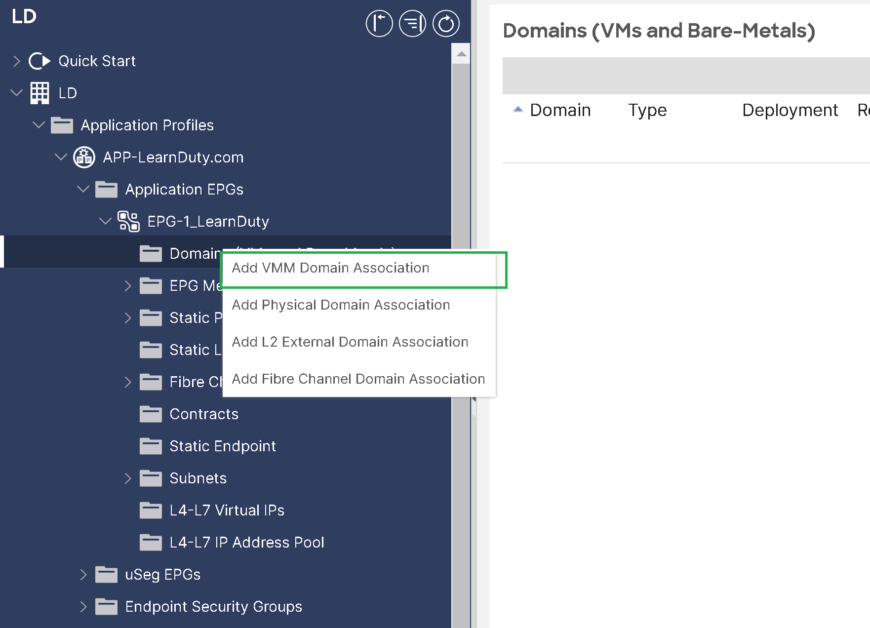
Or if you are using physical domain (bare metal etc.), you may need to add static port where your server/device is connected.
Please refer to the following article about static port binding in ACI:

