Cisco ACI Multi-site Templates Configuration in MSO
Contents
I- Create a Tenant in MSO
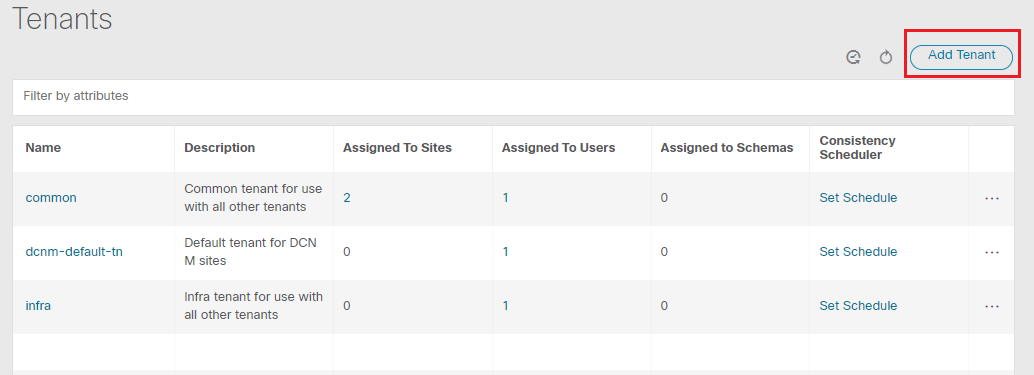
In the Multi-Site Orchestrator, select Application Management > Tenants:
- Click on Add Tenant:
- Enter the Tenant name and select sites to associate with, and click Save :
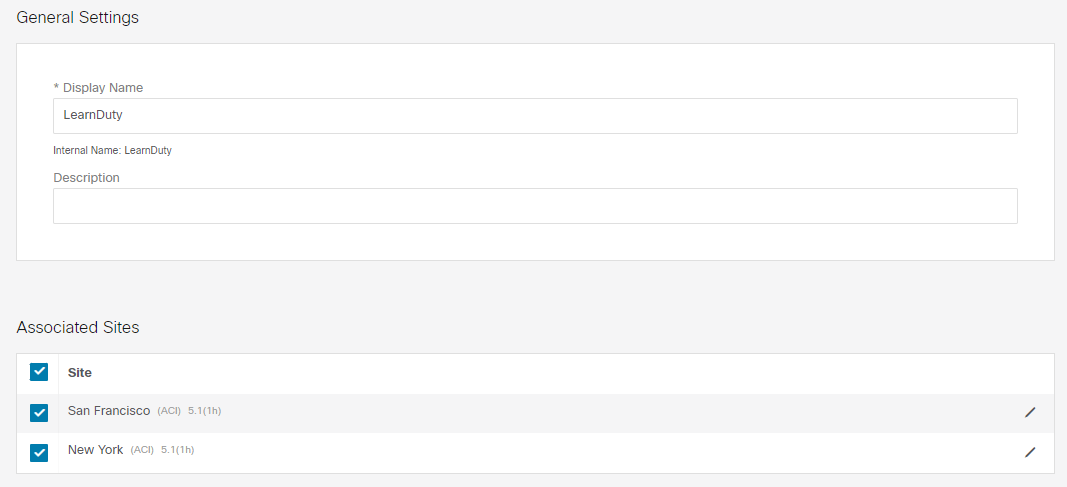
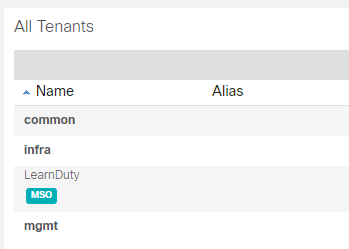
- We can on the APICs of the sites Fabrics that a Tenant “LearnDuty” was created with a tag “MSO”.
II- Schemas and Templates configuration
We will treat some use cases while creating Schemas and Templates:
Use case: Layer 3 only Communication across Sites (Intra-VRF)
This use case will show Layer-3 communication across sites. The Tenant and VRF objects will be stretched across sites, but the BD, Subnet, and EPG configuration will be local to each site.
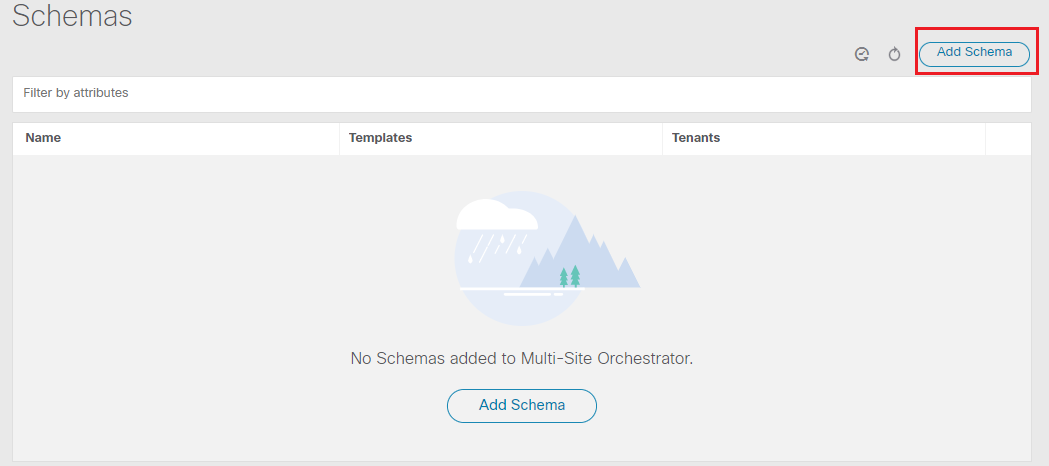
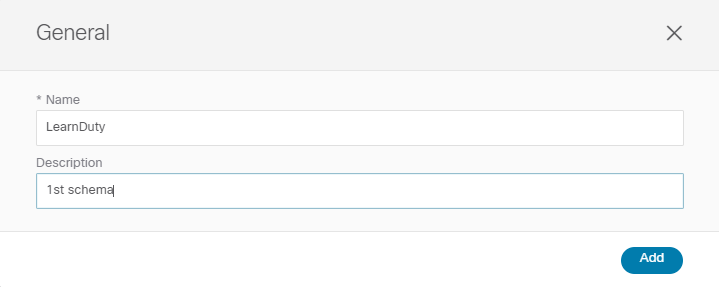
- Create a Schema:
In the MSO, select Application Management > Schemas, and click on “Add Schema“:
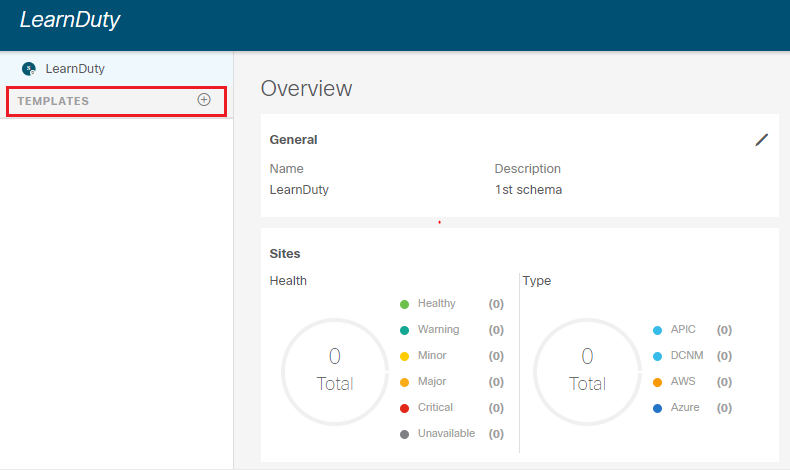
- Create a Template:
In the Schema page, create a new template:
Chose ACI Multi-cloud template type and click Add:
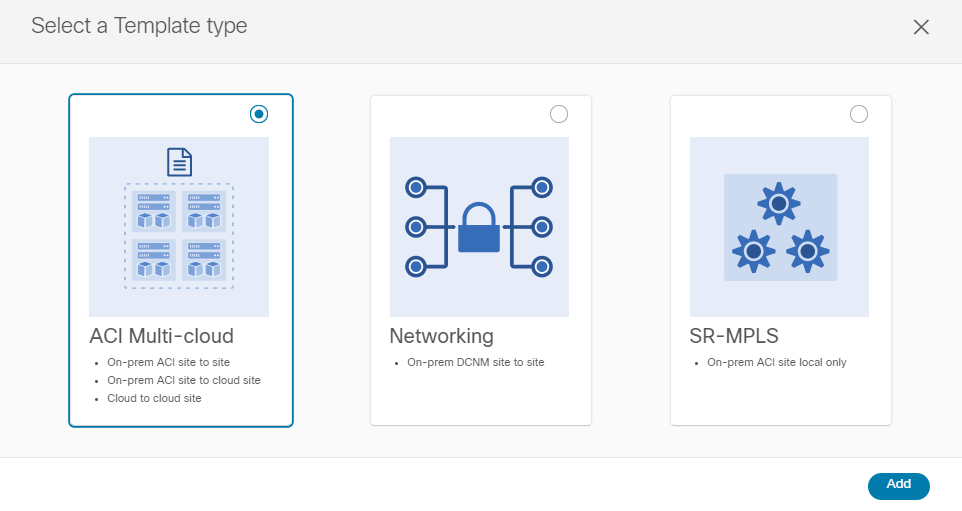
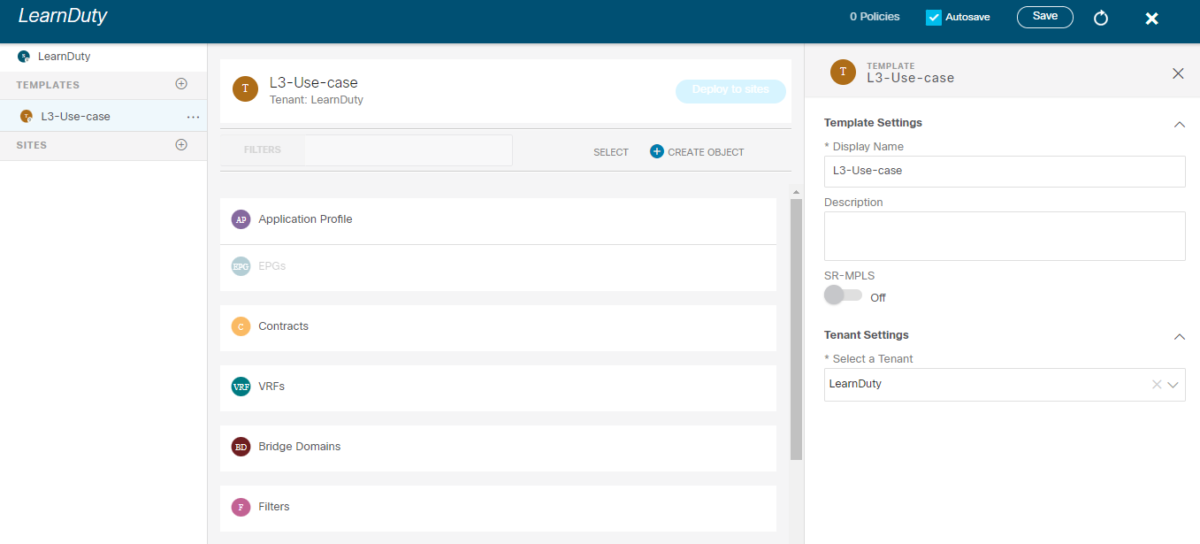
Give the Template a name and select the Tenant:
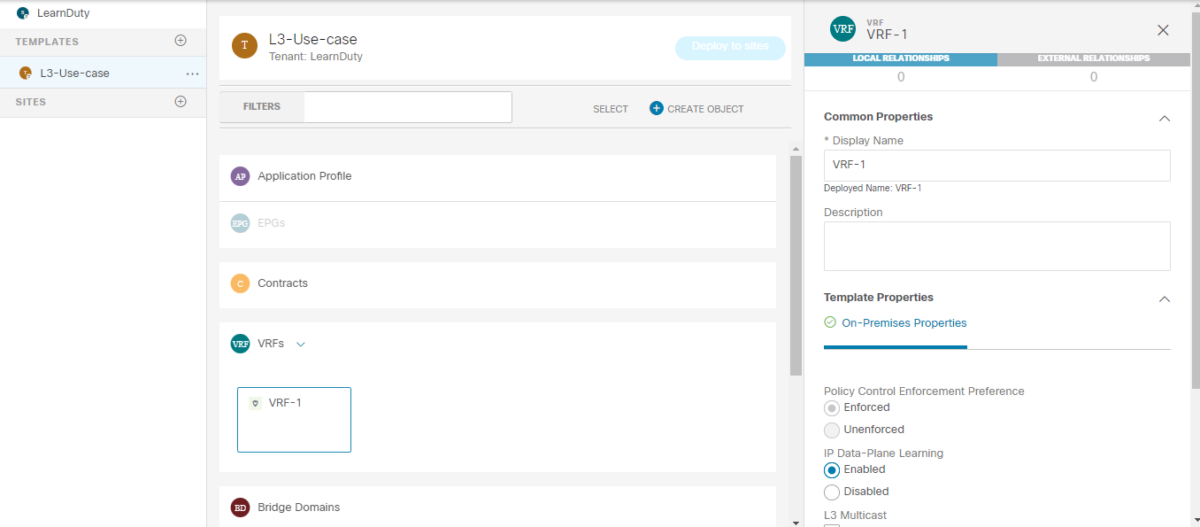
In this template, first of all, we will create a VRF and associate it to both sites:
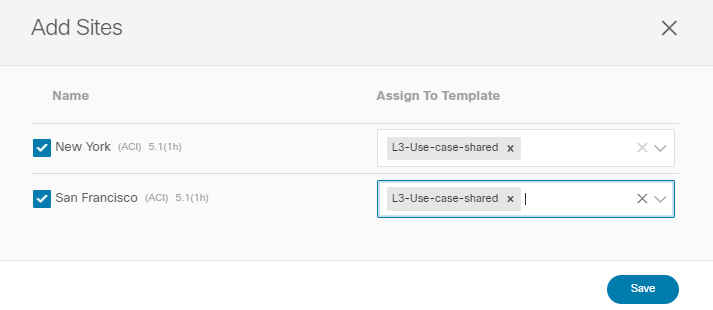
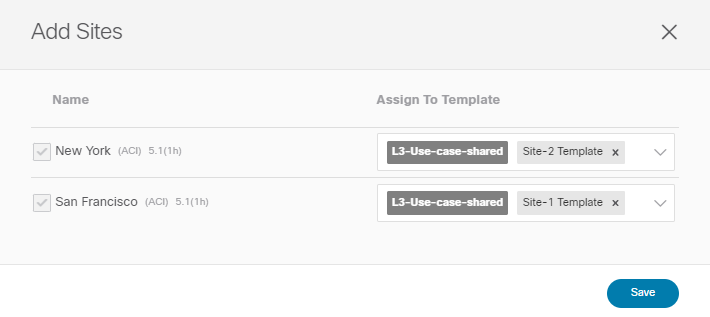
Add the sites to the Schema and associate them to the template:
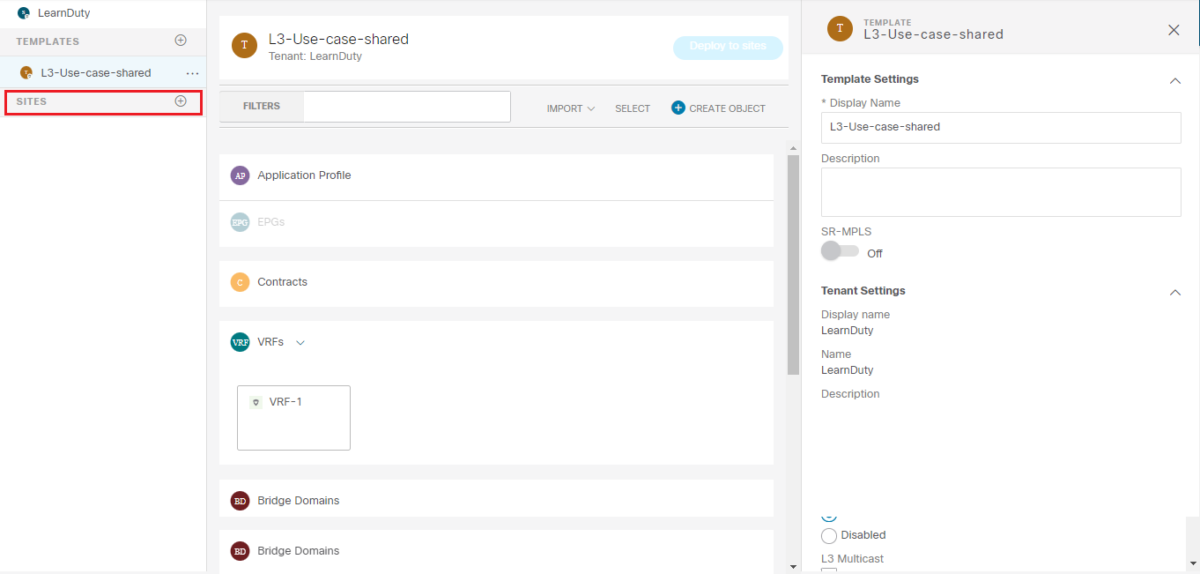
This template will be a shared (or stretched) template, It will be associated to both sites:
- Save and Deploy the configuration
On MSO Interface there is a Save button and a Deploy to sites button. Saving the template configuration saves it to the MSO database but does not make any changes to the APICs. Deploy is needed to push the configuration to the Sites Fabric APICs:
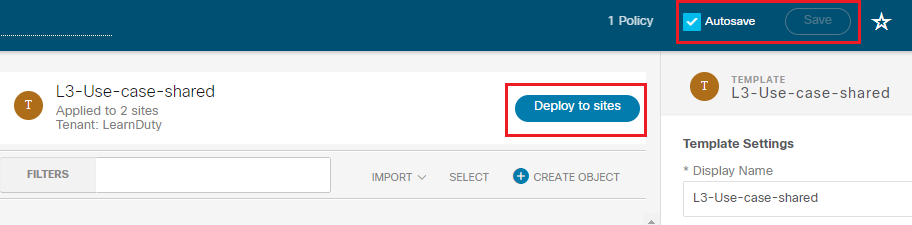
Click on Deploy to sites, we can check that the template configuration is pushed to both sites when deploying:
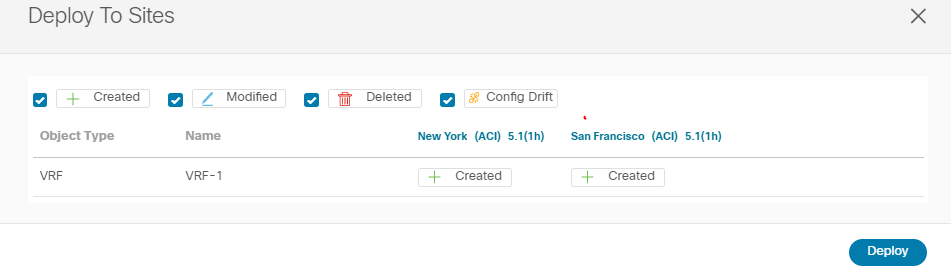
We can verify that the Streched VRF was configured on both sites from MSO:
- Site1:
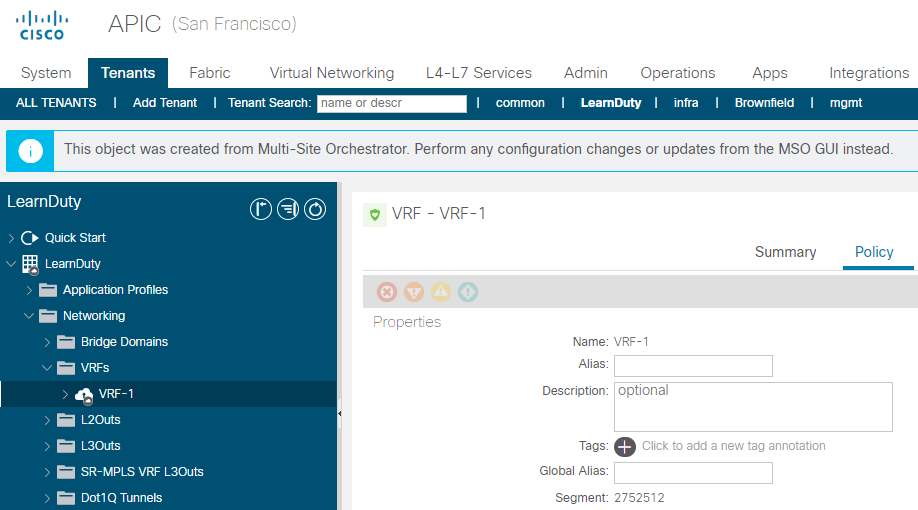
- Site2:
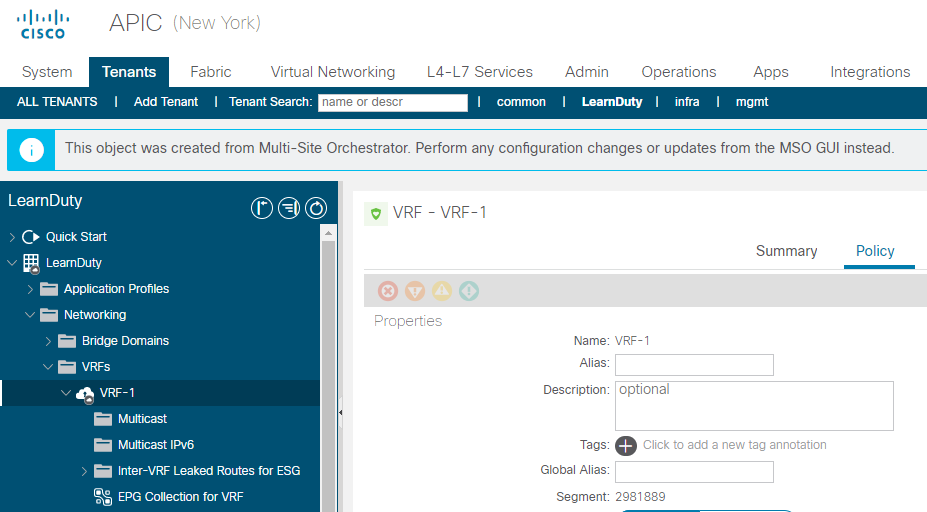
At this stage, we have a template (shared between 2 sites) making the VRF VRF-1 streched between sites.
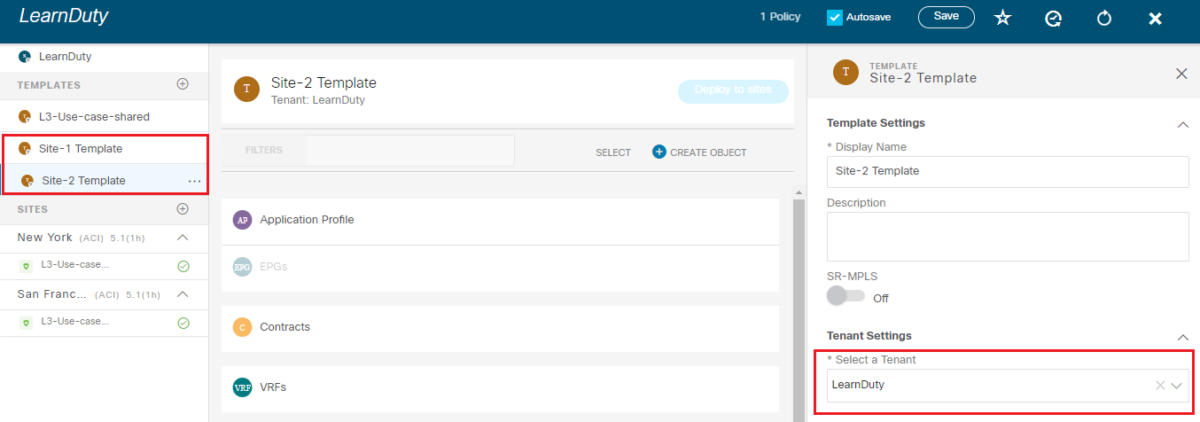
Now, We will add 2 templates to the schema:
- Site-1 Only Template: This template will contain the BD, Subnets, and EPGs that will be locally deployed at site 1.
- Site-2 Only Template: This template will contain the BD, Subnets, and EPGs that will be locally deployed at site 2.
Create the templates, set the Tenant to “LearnDuty”:
Associate the templates to their sites:
For each tempate, create its Application Profile, EPG and Bridge Domain:
- For Site-1 Template:
– Application profile: APP-1
– EPG: WEB1-EPG
– Bridge Domain: WEB-1_BD
- For Site-2 Template:
– Application profile: APP-2
– EPG: WEB2-EPG
– Bridge Domain: WEB-2_BD
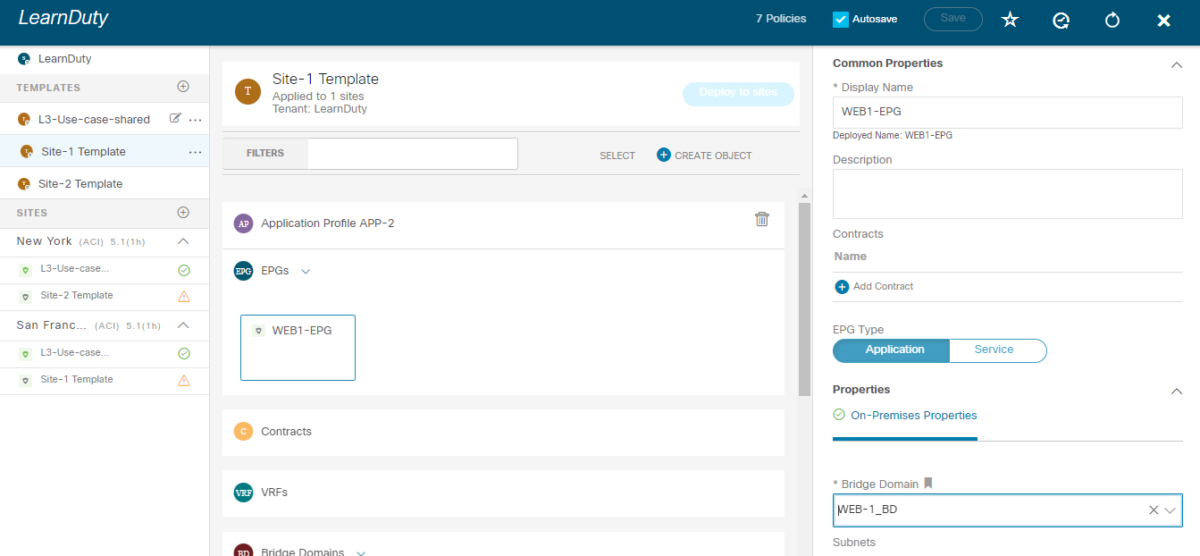
In the Bridge domain parametres, select the VRF VRF-1 and uncheck the L2 Stretch box:
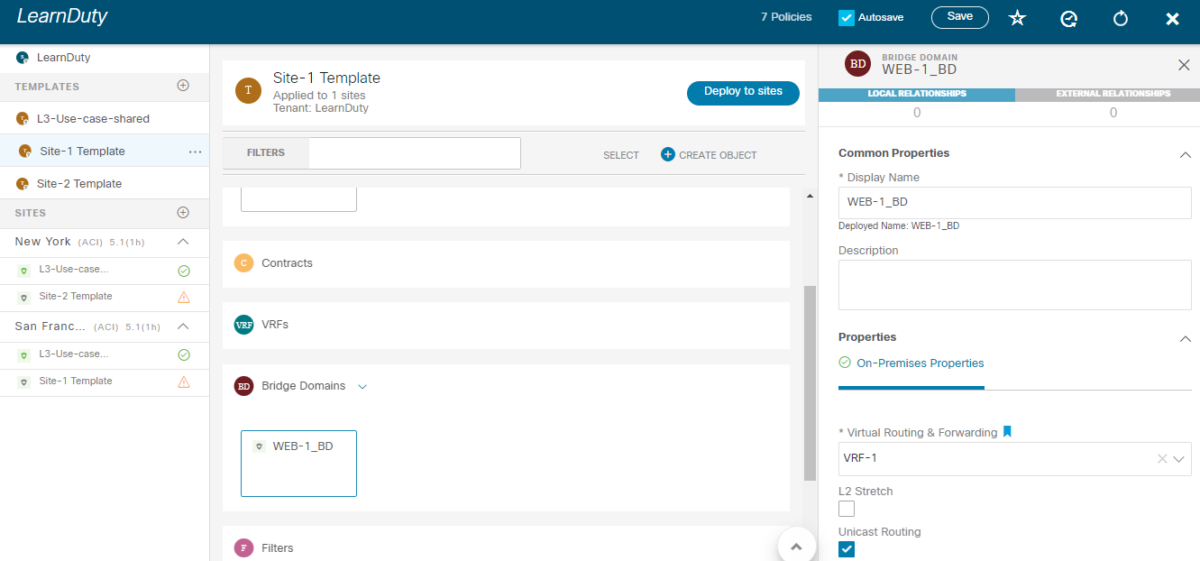
Note: L2 Strech is the default configuration for the BD in MSO. When the L2 Stretch box is unchecked the option to add a BD subnet is removed. This is because the BD becomes a site local configuration.
Deploy the configuration of both templates:
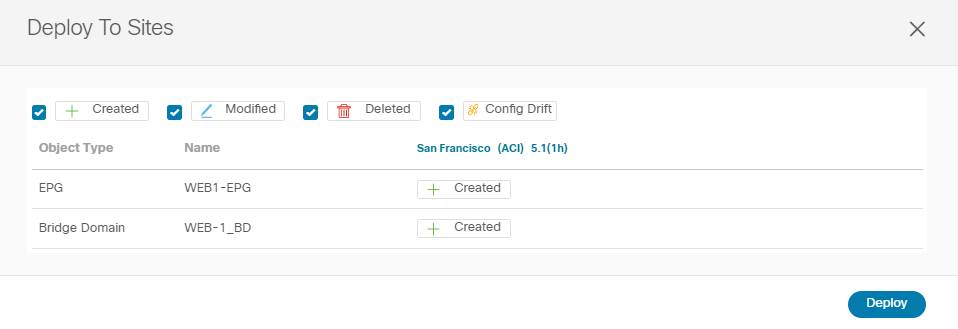
- Deploy Site-1 Template:
We can see that only site 1 is configured when deploying:
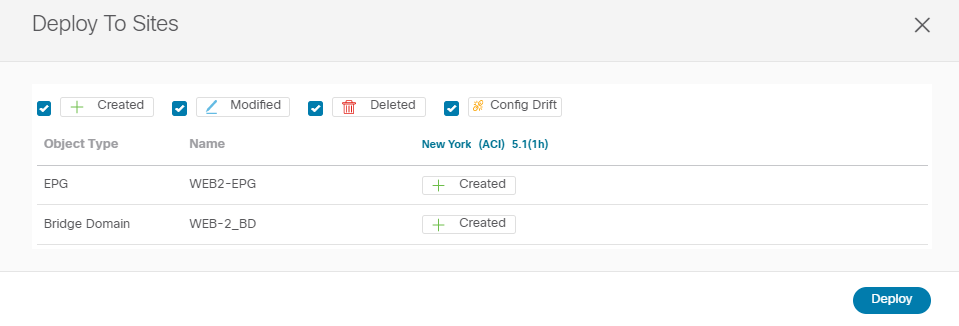
- Deploy Site-2 Template:
Same way, we can see that only site 2 is configured when deploying the “Site-2 Template” :
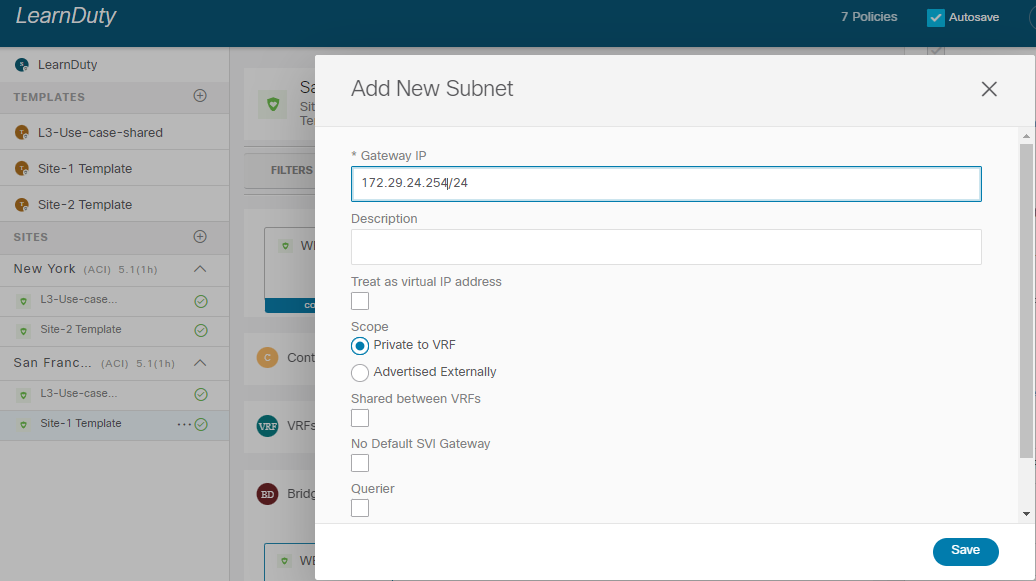
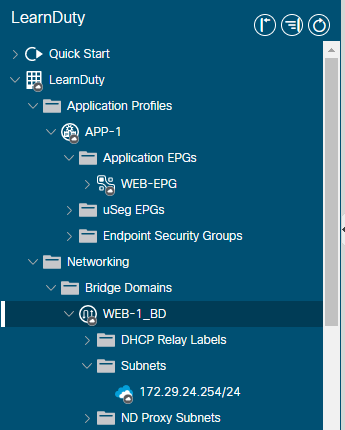
- Configure the Bridge Domain Gateway (Subnet) for each site:
Since the Bridge Domain is a site local configuration (L2 Stretch unchecked), we have to configure its subnet from site-local configuration view, not in the template:
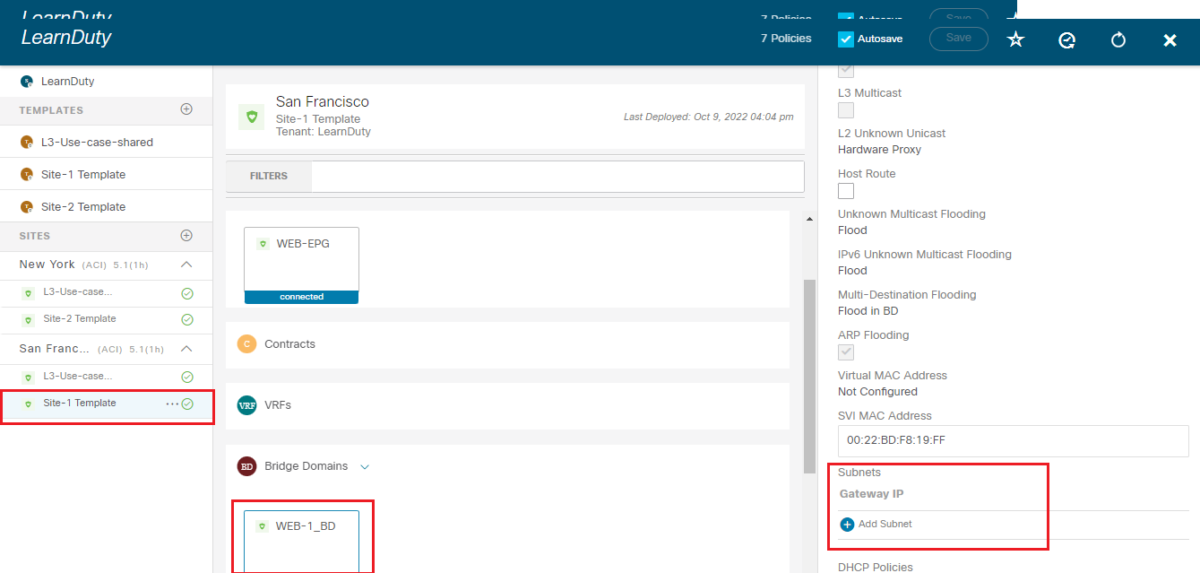
Site-local configuration changes are not displayed in the Template view. They are visible only in the site view.
Click on Add Subnet:
Note: Even if the configuration is done from the Sites view level, the Deployment of the configuration is always done from the Template level.
Next, click on each site specific template and Deploy the configuration.
Note
EPGs are also associated to domains (physical or VMM domains). The domain association and static path binding configuration is also done from the MSO. This will always be a site local configuration task and will be configured from selecting the site just as what was done for the BD subnet (for unstretched BD).
We can verify that the configuration was pushed properly from the APIC level:
- Configure a Contract in the Shared template (associated to both sites) ,L3-use-case-shared template:
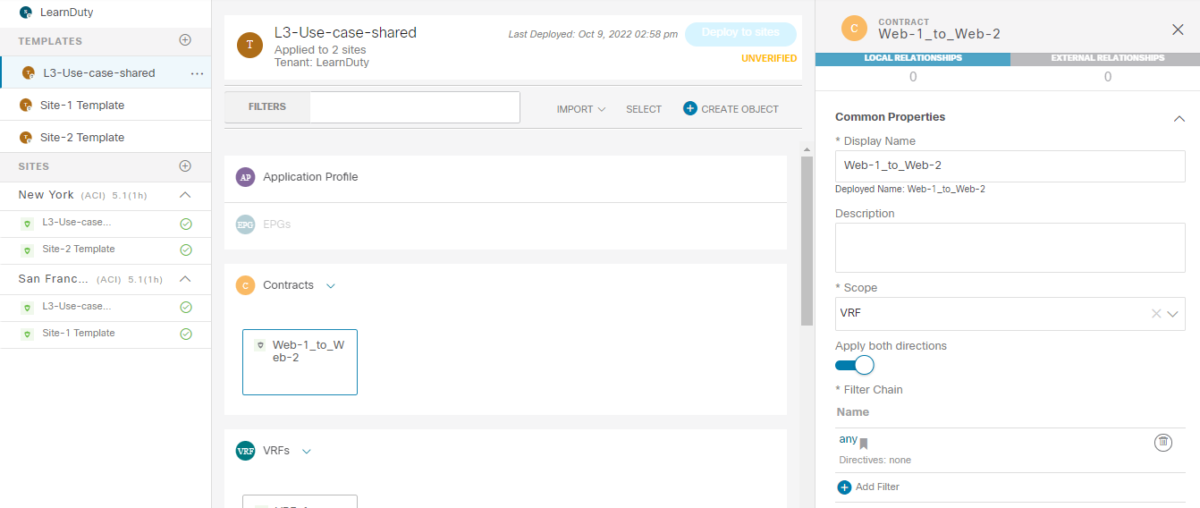
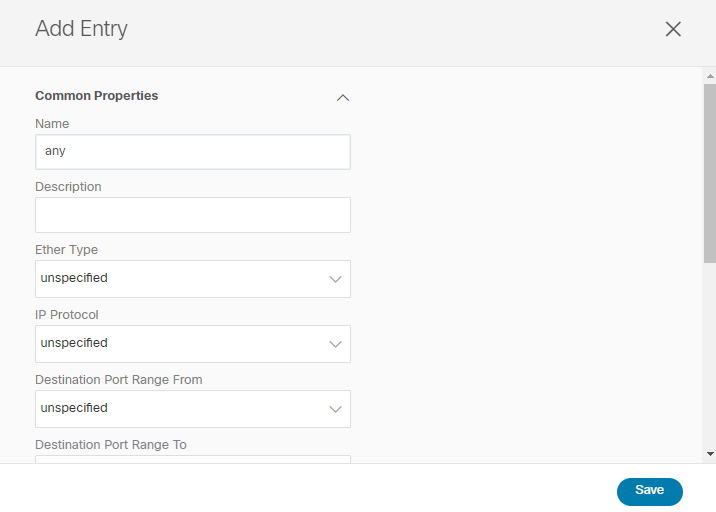
Add filter “any” to the contract and define it:
Deploy the Template to sites:
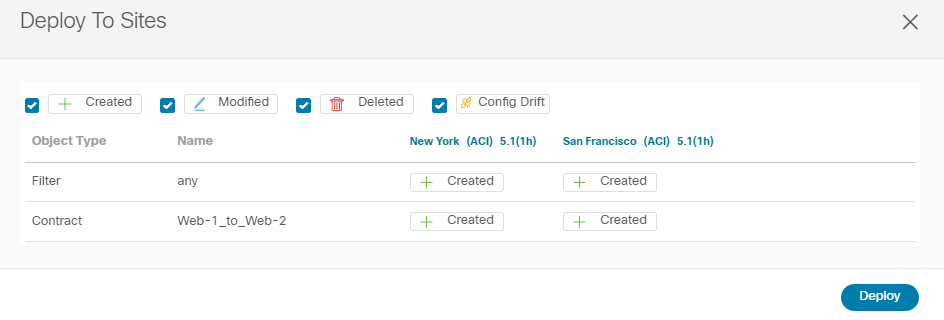
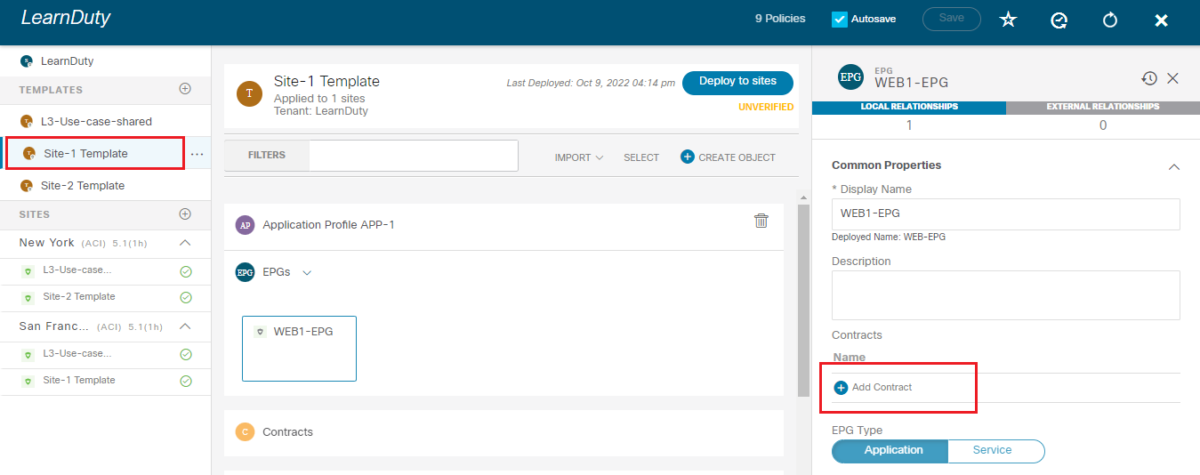
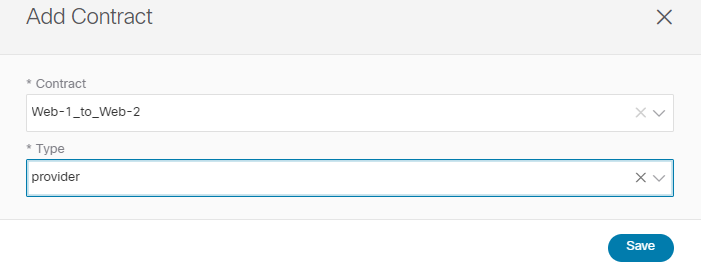
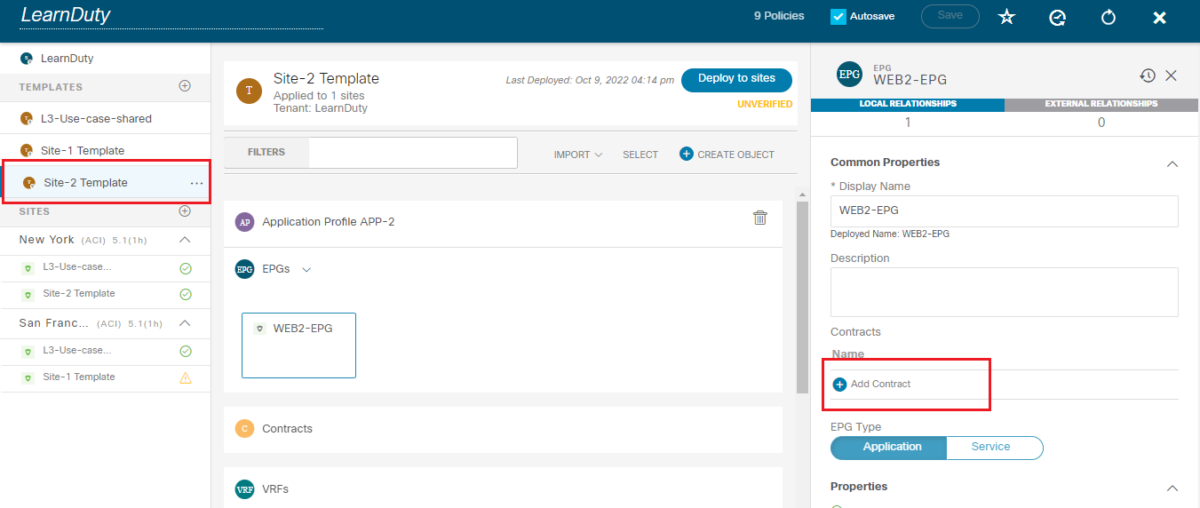
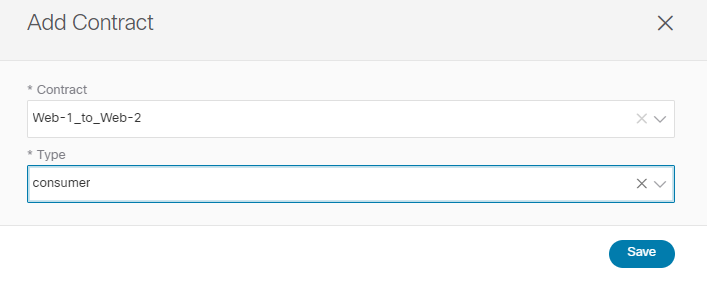
Now, we will add a web-1_to_Web-2 provider contract to the Web-1 EPG in the Site-1 Only template, and a web-1_to_Web-2 consumer contract to the Web-2 EPG in the Site-2 Only template.
This will enable the application tiers to communicate between sites as long as they are deployed in the same tenant.
- In the “Site-1 Template”:
- In Site-2 Template:
And Deploy the configuration of both templates.
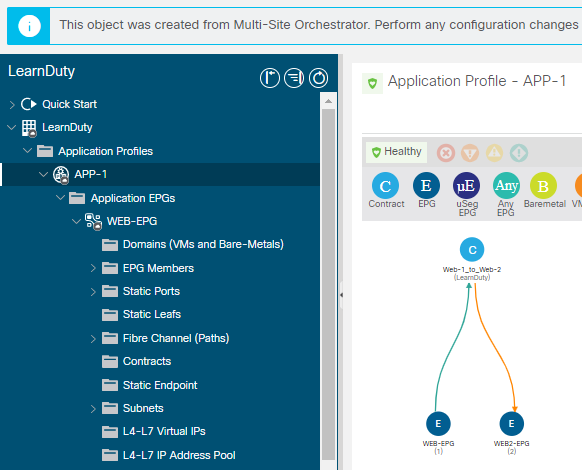
On any site, we can verify that the contract was applied in the APIC level, the WEB2-EPG is showing up in the topology of the APIC of the first site, even if the the EPG wasn’t configured in this site.
It’s a shadow EPG, It was created in order to Apply the contract and allow communication between these EPGs accross.
That’s all with the first use case, in summary:
- We have configured a shared template (both site associated) and configured in it: Tenant, VRF and Contract.
- We have 2 site specific tempates (one for each site) and configured in it: Application profile, EPG, BD.