Cisco ACI DHCP Relay Explained and Configuration
Reference: Cisco
Contents
Introduction
Because flooding within a bridge domain is enabled by default, clients can connect to DHCP
servers within the same EPG. However, when the DHCP server is in a different EPG, BD, or context (VRF) than the clients, DHCP Relay is required. Also, when Layer 2 flooding is disabled, DHCP Relay is required.
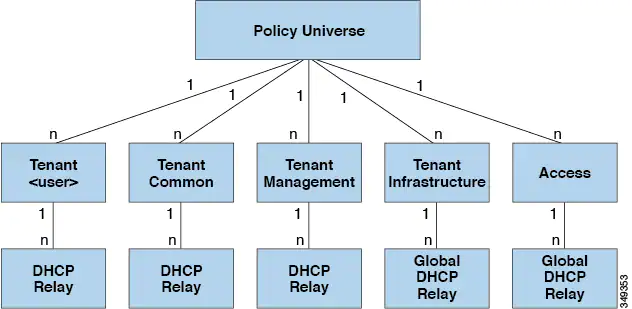
- Common Tenant: DHCP Relay policies can be used by any tenant
- Infra Tenant: DHCP Relay policies are exposed selectively by the ACI fabric service provider to other tenants
- Fabric Access (infra:Infra): DHCP Relay Policies can be used by any tenant and they allow more granular configuration of the DHCP servers. In this case, it is possible to provision separate DHCP servers within the same bridge domain in the node profile.
The DHCP Relay profile contains one or more providers. An EPG contains one or more DHCP servers, and the relation between the EPG and the DHCP Relay specifies the DHCP server ip address.
The consumer bridge domain contains the DHCP label that associates the provider DHCP server
with the bridge domain. Label matching enables the bridge domain to consume the DHCP Relay policy.
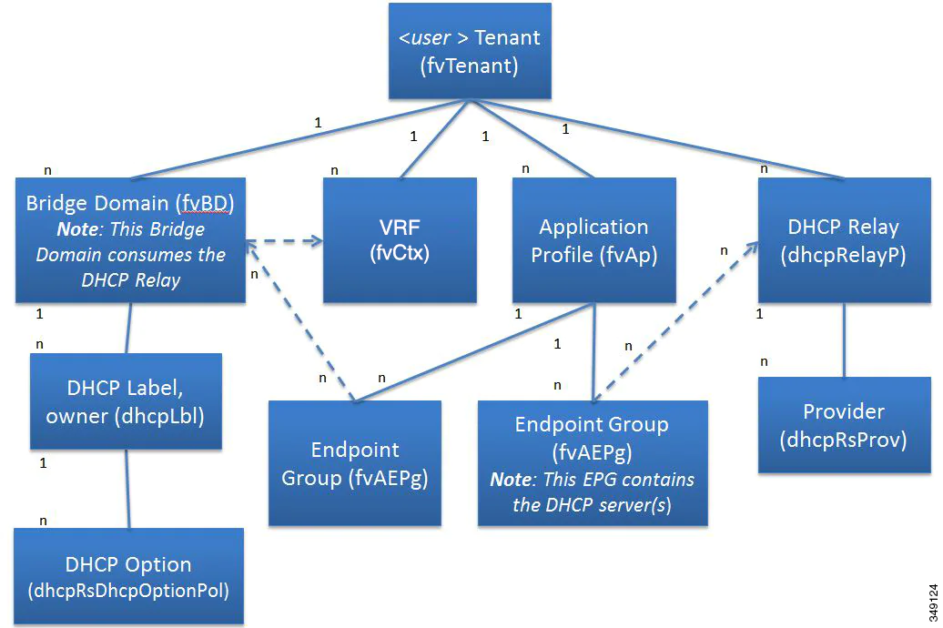
The DHCP label object also specifies the owner. The owner can be a tenant or the access infrastructure. If the owner is a tenant, the ACI fabric first looks within the tenant for a matching DHCP Relay. If there is no match within a user tenant, the ACI fabric then looks in the common tenant.
The bridge domain DHCP label must match the DHCP Relay name.
Note – DHCP option 82 support
When the ACI fabric acts as a DHCP relay, it inserts the DHCP Option 82 (the DHCP Relay Agent Information Option) in DHCP requests that it proxies on behalf of clients. If a response (DHCP offer) comes back from a DHCP server without Option 82, it is silently dropped by the fabric. When ACI acts as a DHCP relay, DHCP servers providing IP addresses to compute nodes attached to the ACI fabric must support Option 82. Windows 2003 and 2008 do not support option 82 but Windows 2012 does.
Cisco ACI DHCP Relay configuration
We will discuss 2 types of ACI DHCP Relay configuration:
- Global DHCP Relay Access
- Tenant-Based DHCP Relay
I- Global DHCP Relay Access
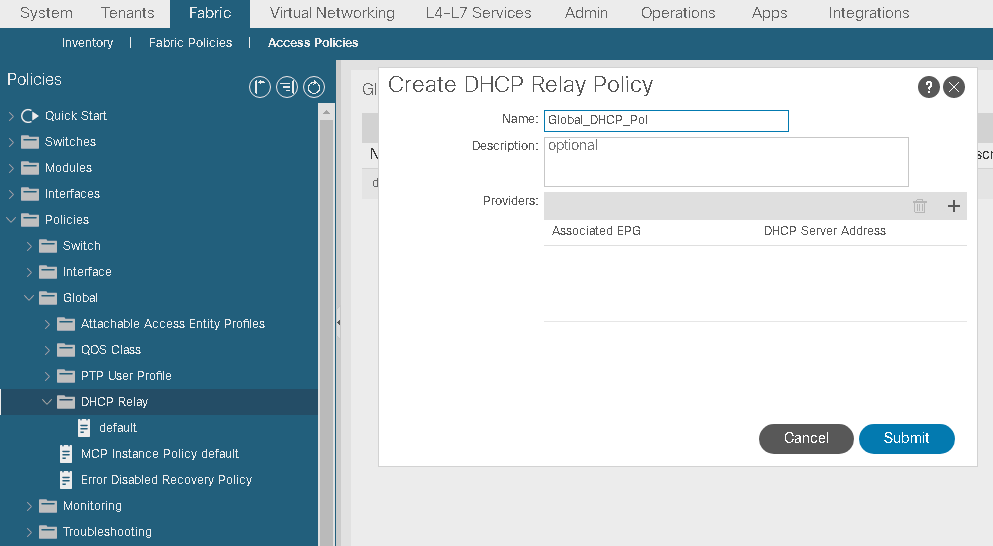
1- Create a Global DHCP Relay Policy:
Navigate to Fabric > Access Policies > Policies > Global > DHCP Relay and click on “Create a DHCP Relay Policy”:
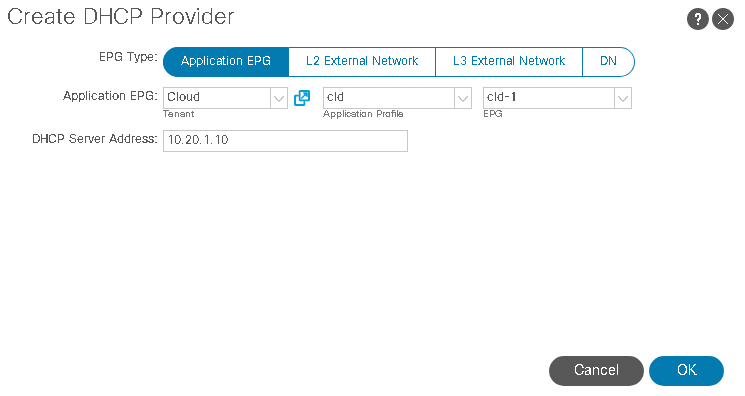
2- Create a DHCP Provider for the DHCP Relay Policy:
Chose the EPG or L2Out or L3Out where the DHCP Server (Provider) resides, and Also enter the DHCP Server IP address:

3- Consume the Global DHCP Policy under the Tenant “Cloud”:
Under the Bridge Domain (where the DHCP requestors resides), click on “Create DHCP Relay Label”

- Create DHCP Relay Label:
The first input for the DHCP Relay Label is the scope.
The scope is the owner of the target relay. The relay owner can be:
– Infra: Only DHCP relay policies created in the Fabric > Access Policies tab will be displayed. This configuration should be used for a policy that is intended to be used fabric wide. (default)
– Tenant: Only DHCP relay policies created in the tenant will be displayed.
In this first case, we will use a DHCP Relay Policy from Infra (Access Policies), which we create in the first step:

II- Tenant-Based DHCP Relay
In this type of configuration, we have 2 options:
- Configure the DHCP Relay Policy under the user Tenant: can be consumed only by the user Tenant Endpoints.
- Configure the DHCP Relay Policy under the Common Tenant: can be consumed by any tenant.
1- Create a DHCP Relay Policy:
Navigate to Tenant > Policies > Protocol > DHCP and create a DHCP Relay Policy:
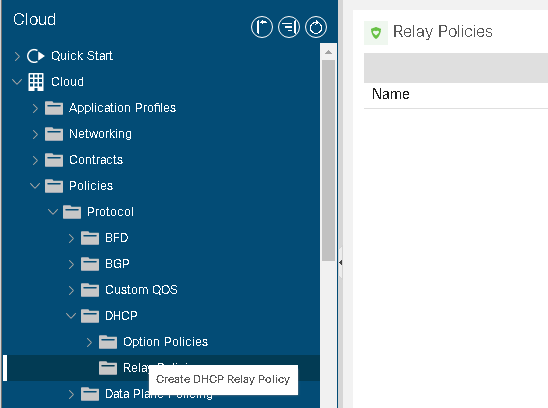
Click on Create DHCP Relay Policy:
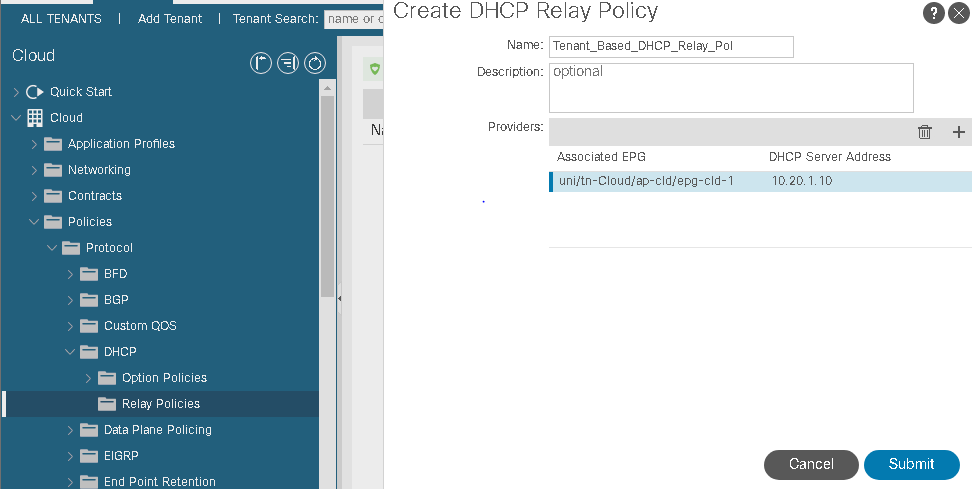
2- Create a DHCP Provider:
Chose EPG of the DHCP server and its IP:
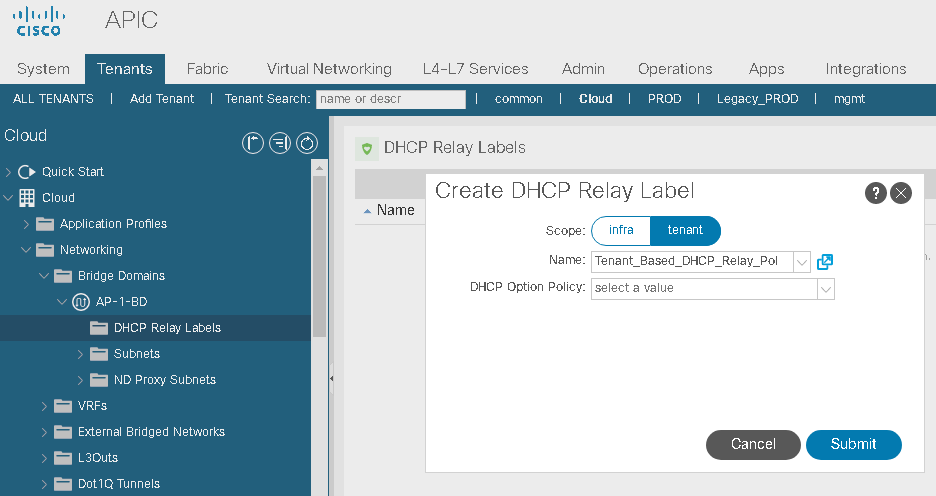
3- Create DHCP Relay Label
On the same Tenant, and under the BD, create a DHCP Relay Label and chose the previously created DHCP Relay Policy.
Note: if the DHCP Relay Policy was created under the common Tenant it could be used by any Bridge Domain on any Tenant.
On the DHCP Relay Label scope, chose Tenant and select the DHCP Relay policy:
Below is a pretty useful document for DHCP Relay for ACI: DHCP Relay for ACI